Configuring Your Mouse
Next, the installation program probes for a mouse (Figure 14-28). Use the Up and Down arrow keys to confirm or change the selection as required.
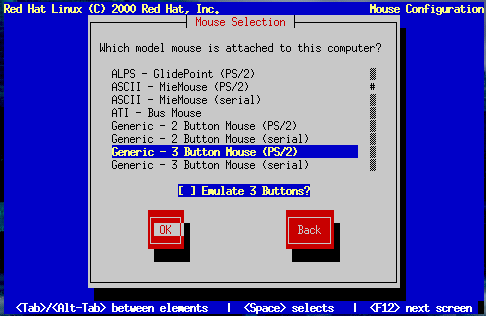
If no mouse is detected, you'll have to select one manually.
To determine your mouse's interface, follow the mouse cable back to where it plugs into your system. If the connector at the end of the mouse cable plugs into a rectangular connector, you have a serial mouse. On the other hand, if the connector is round, you have a PS/2 mouse. If you are installing Red Hat Linux on a laptop computer, in most cases the pointing device will be PS/2 compatible.
If you cannot find an exact match, select one of the Generic entries, based on your mouse's number of buttons, and its interface.
The Emulate 3 Buttons check box allows you to emulate a three-button mouse if your mouse only has two buttons. If you select this check box, you can simulate the third, "middle" button by pressing both mouse buttons simultaneously. If you have a two-button mouse, checking this box is a good idea, since the X Window System is easiest to use with a three-button mouse.
If you've selected a mouse with a serial interface, highlight the appropriate serial port, select OK, and press Space.
 | Tip |
|---|---|
To change your mouse configuration after you have booted your Red Hat Linux system, become root and use the /usr/sbin/mouseconfig command. To configure your mouse as a left-handed mouse after you have booted your Red Hat Linux system, open a terminal and type gpm -B 321. |