Partitioning Your System
At this point, you must tell the installation program where to install Red Hat Linux. This is done by defining mount points for one or more disk partitions in which Red Hat Linux will be installed.
Graphical Display of Hard Drive(s)
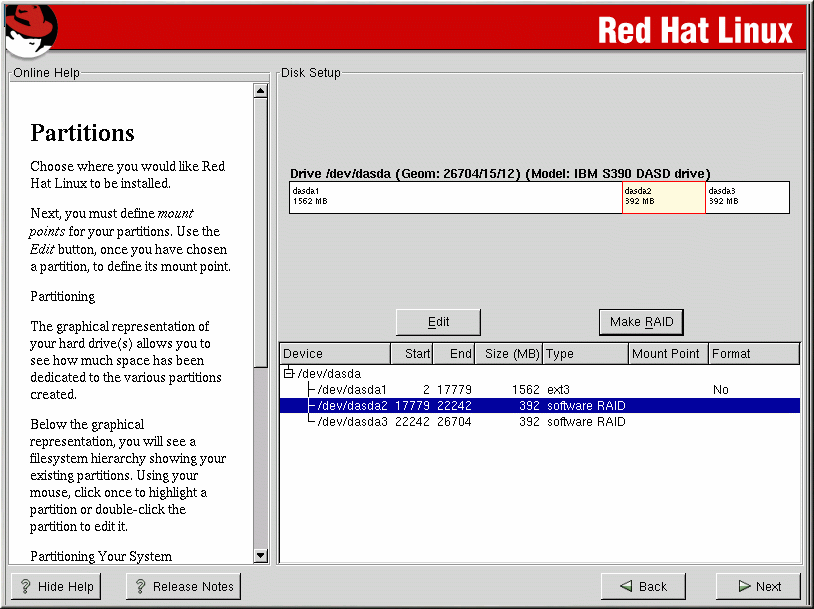
Disk Druid offers a graphical representation of your hard drive(s).
Using your mouse, click once to highlight a particular field in the graphical display. Double-click to edit an existing partition and assign a mount point.
Above the display, you will see the drive name (such as /dev/dasda), the geom (which shows the hard disk's geometry and consists of three numbers representing the number of cylinders, heads, and sectors as reported by the hard disk), and the model of the hard drive as detected by the installation program.
 | Note |
|---|---|
For S/390 systems, Disk Druid will only assign (or edit) mount points for the partitions you created using fdasd. You will not be able to add or delete partitions using Disk Druid. |
Disk Druid's Buttons
These buttons control Disk Druid's actions. They are used to change the attributes of a partition (for example the filesystem type and mount point) and also to create RAID devices. Buttons on this screen are also used to accept the changes you have made, or to exit Disk Druid. For further explanation, take a look at each button in order.
Edit: Used to modify attributes of the partition currently selected in the Partitions section. Selecting Edit opens a dialog box. Some or all of the fields can be edited, depending on whether the partition information has already been written to disk.
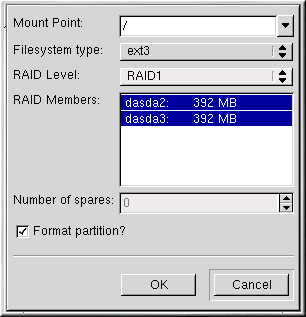
Make RAID: Make RAID can be used if you want to provide redundancy to any or all disk partitions. It should only be used if you have experience using RAID. To read more about RAID, please refer to RAID (Redundant Array of Independent Disks) in the Official Red Hat Linux Customization Guide.
To make a RAID device, you must first create software RAID partitions. Once you have created two or more software RAID partitions, select Make RAID to join the software RAID partitions into a RAID device.
Partition Fields
Above the partition hierarchy are labels which present information about the partitions you are creating. The labels are defined as follows:
Device: This field displays the partition's device name.
Start: This field shows the sector on your hard drive where the partition begins.
End: This field shows the sector on your hard drive where the partition ends.
Size: This field shows the partition's size (in MB).
Type: This field shows the partition's type (for example, ext2 or ext3).
Mount Point: A mount point is the location within the directory hierarchy at which a volume exists; the volume is "mounted" at this location. This field indicates where the partition will be mounted. If a partition exists, but is not set, then you need to define its mount point. Double-click on the partition or click the Edit button.
Editing Partitions
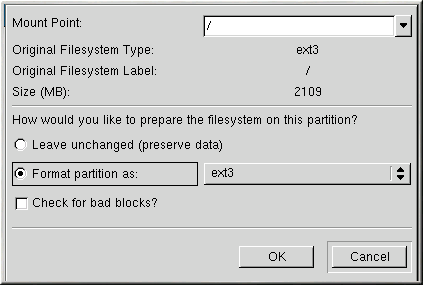
To edit a partition, select the Edit button or double-click on the existing partition.
 | Note |
|---|---|
If the partition already exists on your hard disk, you will only be able to change the partition's mount point. If you want to make any other changes, you will need to delete the partition and recreate it. |
Formatting Your DASD Partitions
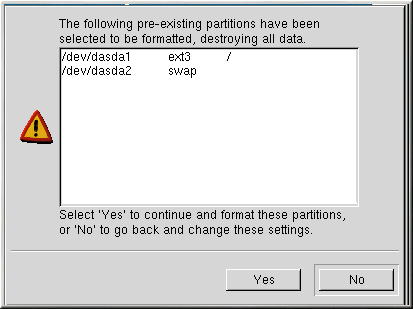
When you click Next to create your DASD partitions, a warning screen will appear. This screen allows you to perform a final check regarding formatting the pre-existing partitions displayed in this warning.
If you do not wish for these partitions to be formatted, select No. By selecting No, you will be able to go back and make any necessary modificiations to your partitions. To continue with the installation, select Yes.


